Email Verification with Zapier: Filter Bad Leads Before Your CRM

A bad email address rarely stays a small problem. It slips in through a signup form, lands in your CRM, then quietly drags down your sender reputation every time you mail the list. Verifying each address by hand is not realistic once leads start arriving around the clock. This is where email verification with Zapier earns its place: it checks every new contact in real time and stops the junk before it ever reaches your other tools. If you want the background on what those checks involve, our guide to how email verification works covers the underlying process.
This walkthrough sets up a no-code Zap that catches an email at the form, verifies it, and only passes the deliverable ones on to your CRM. No developer needed.
What a verification Zap actually does
A Zap is an automated workflow that connects two or more apps, no code required. It starts with a trigger, which is an event in one app, and runs an action, which is something that happens in another app as a result. In a verification Zap the trigger is a new lead, say a form submission, and the action sends that email address to your verifier and gets a status back in real time.
That single status is the whole point. Instead of finding out an address is dead when your campaign bounces, you find out the moment the lead arrives, while you can still do something useful with that information. Every verifier with a Zapier app works on this trigger-and-action pattern, so the steps below apply whether you run MailerCheck, Verifalia, Kickbox or another tool from the thousands of apps on Zapier.
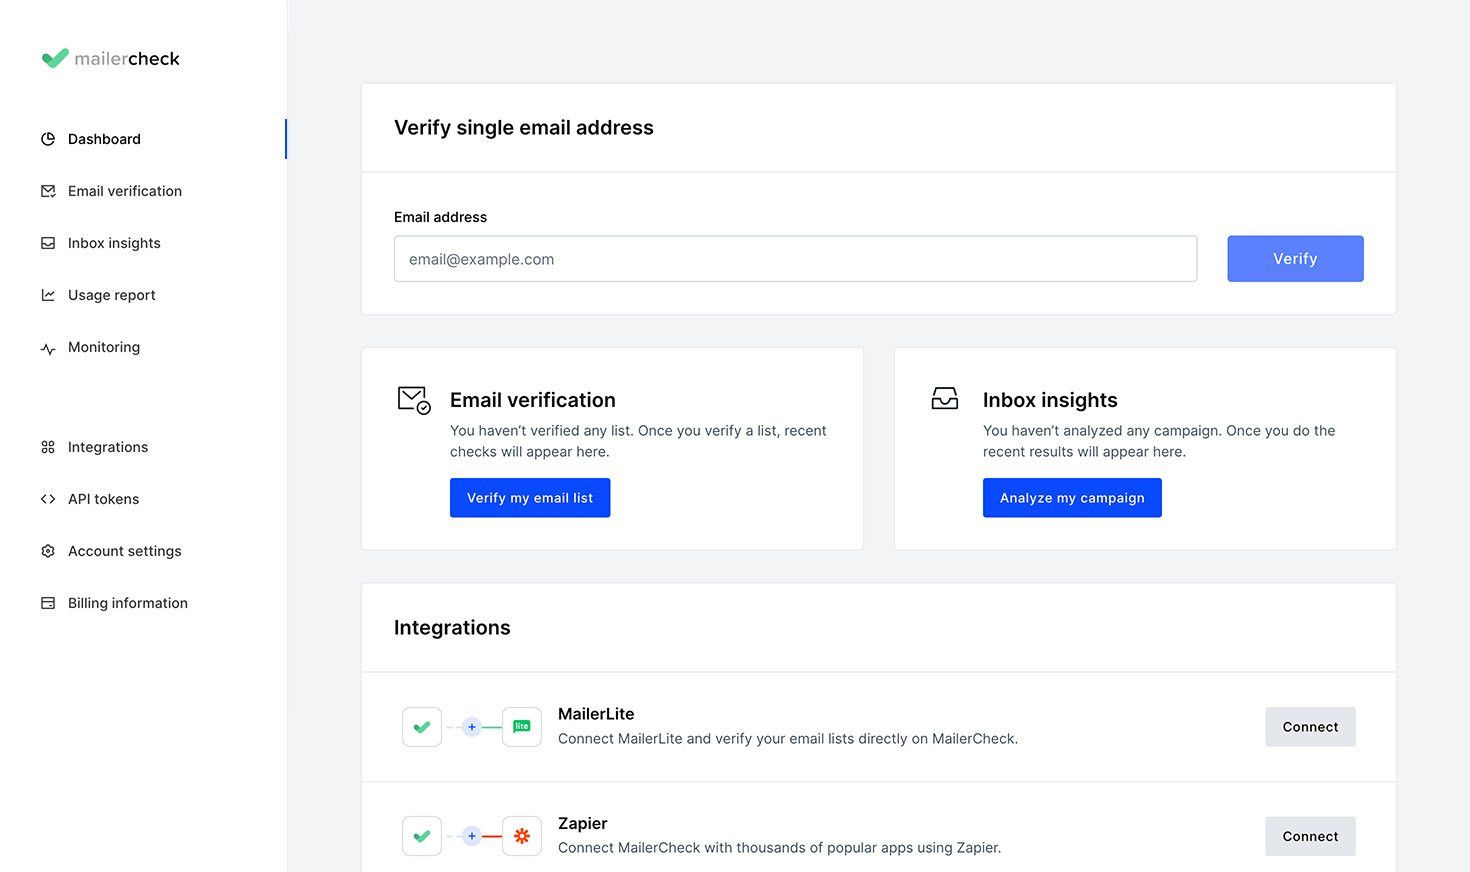
Connect your verifier to Zapier
Before you can build anything, Zapier needs permission to talk to your verifier. The connection is a one-time setup driven by an API token.
- Log in to your Zapier account, or create one if you do not have it yet.
- Open My Apps, search for your verifier by name, and click Connect.
- In your verifier account, open the account or API menu and generate a new API token. Give it a clear name like "Zapier" so you can find it later.
- Copy the token, return to Zapier, paste it into the connection prompt, and confirm access.
That is the connection done. From here you can reuse it across as many Zaps as you like without authenticating again.
 Connecting a verifier as an action step in your Zap
Build the form-to-CRM Zap, step by step
Now for the workflow itself. The example here pulls a new lead from a form and runs its email through the verifier, which is the most common real-time use case. Pick your own trigger app in step two if you collect leads somewhere else.
- Click Create a Zap and set the trigger app to your form tool. Choose the event that fires on a new entry, such as New Submission or New Spreadsheet Row if your form drops leads into Google Sheets first.
- Connect that account, pick the specific form or worksheet, then test the trigger so Zapier pulls in a sample lead.
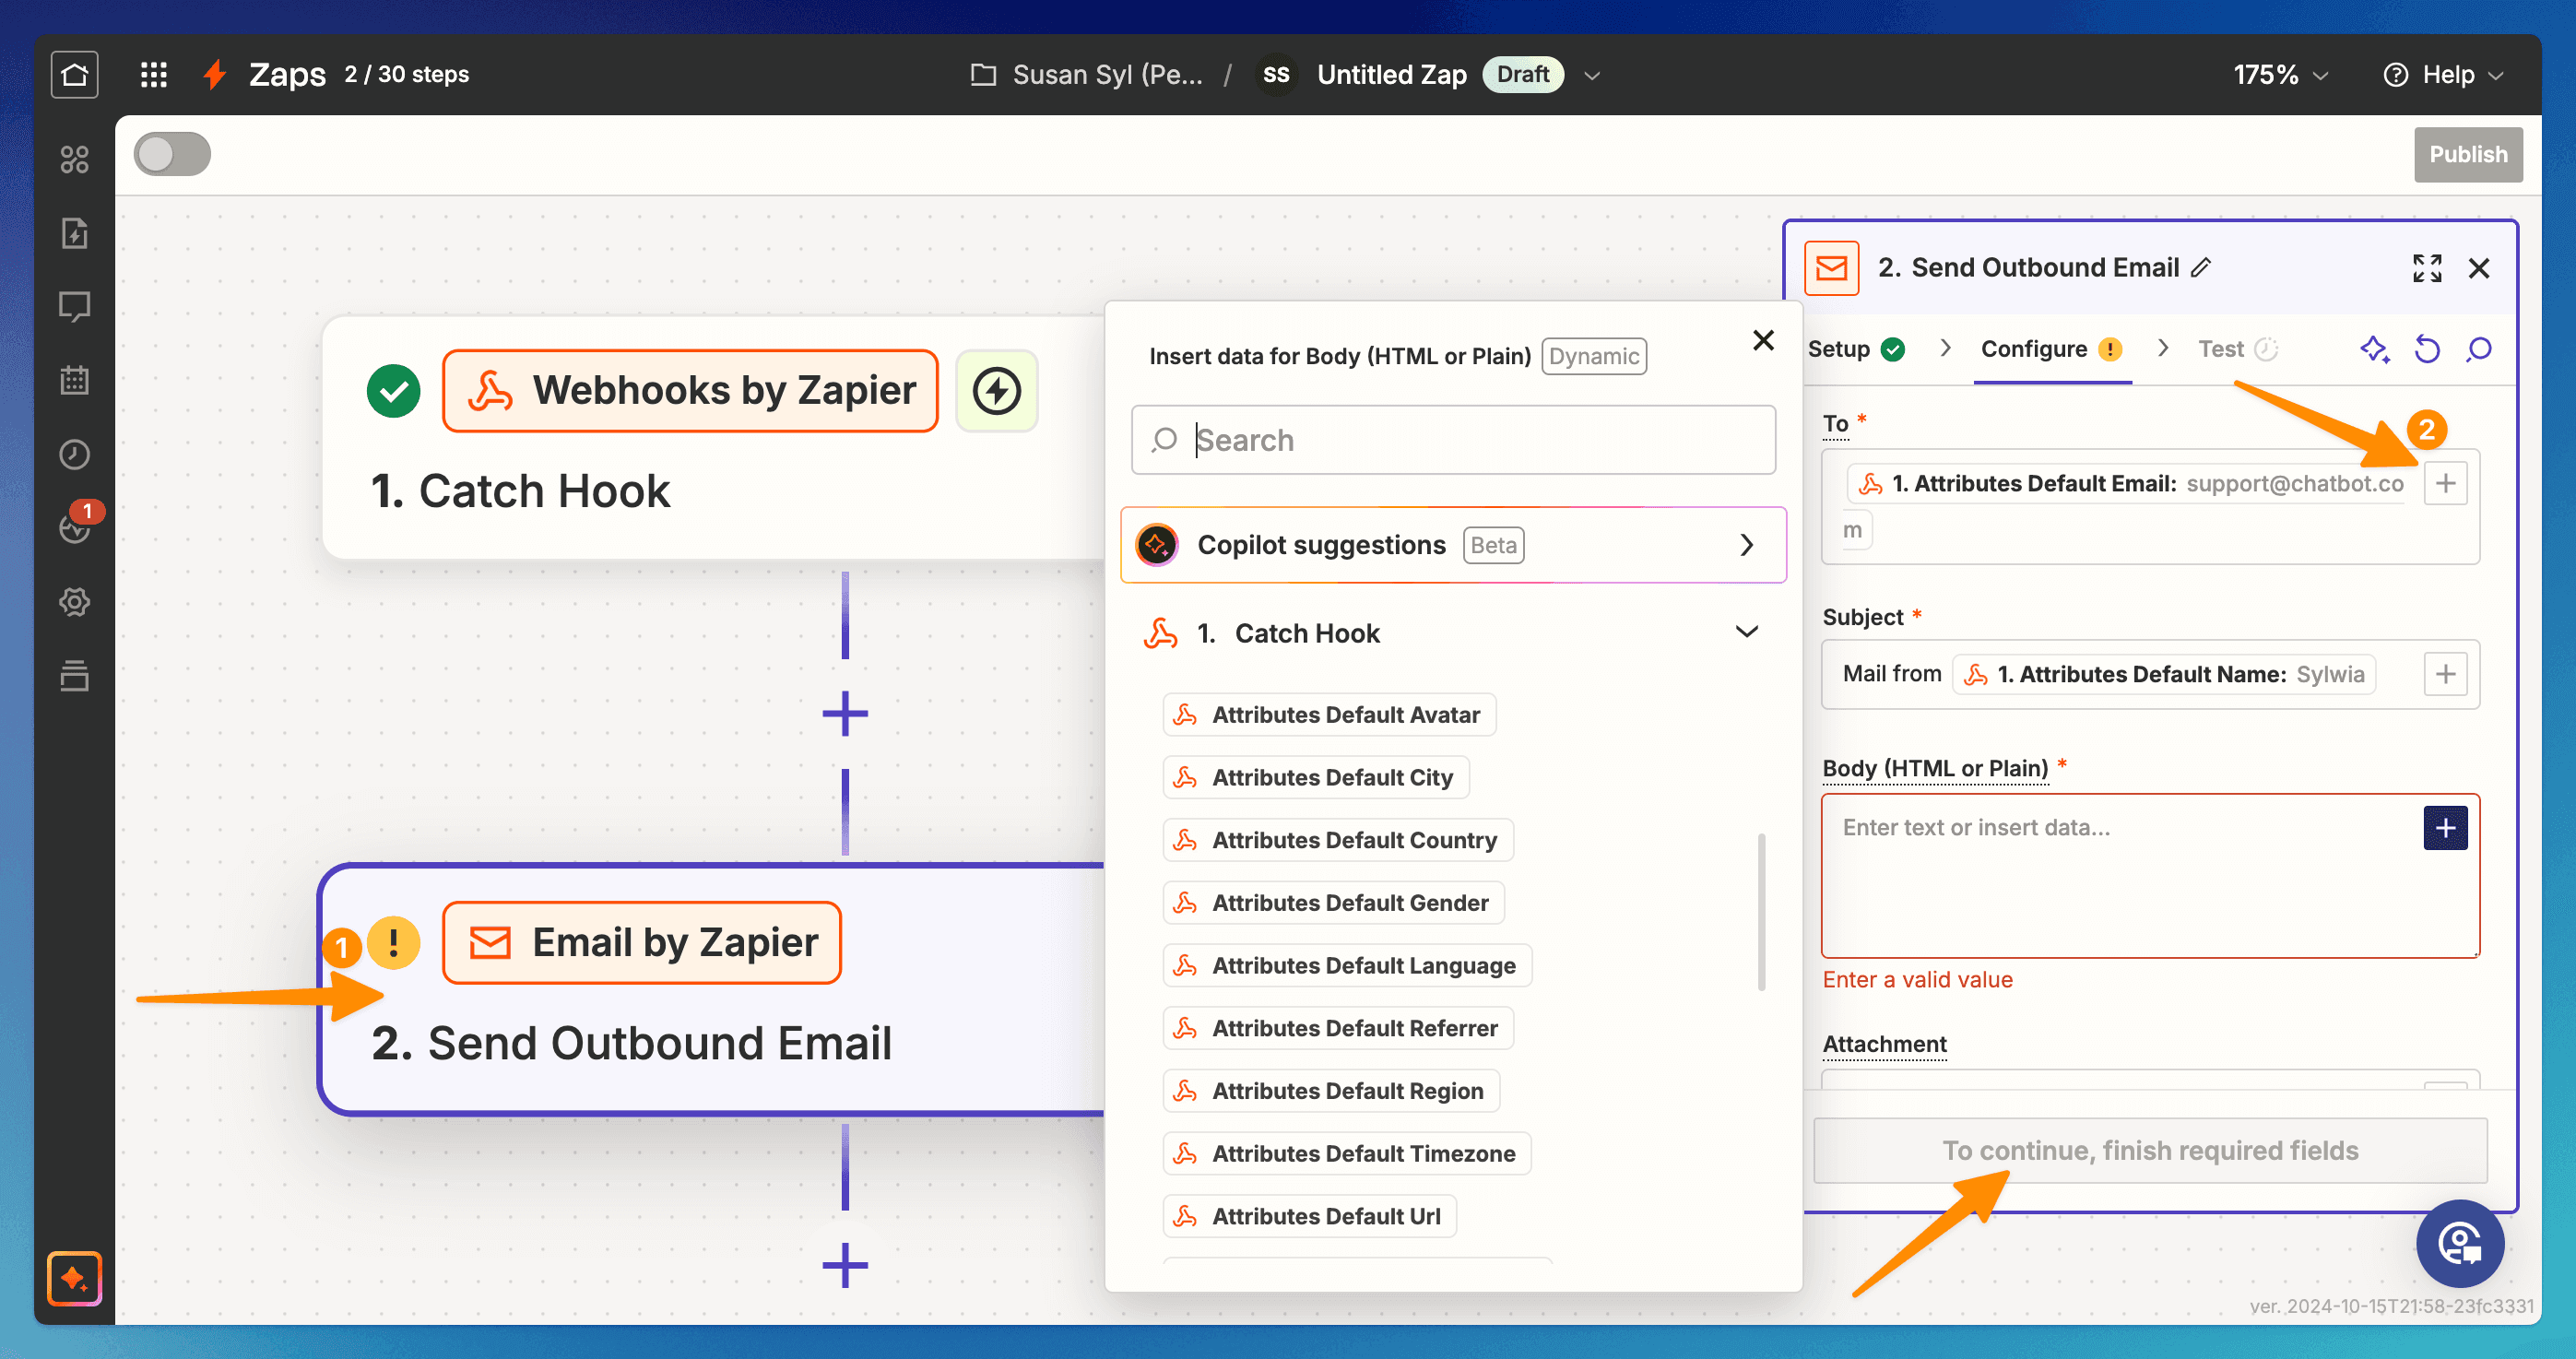
- Add an action step and select your verifier. Choose the Verify an Email Address action, which checks a single address in real time.
- Map the email field from your trigger into the verifier's Email Address To Verify field. This tells the Zap which value to check on every run.
- Test the action. Zapier sends the sample email through the verifier and shows you the result, including the deliverability status you will filter on next.
 The verify action checks each address as it arrives
At this point the Zap can verify, but it still treats every lead the same. The filter is what turns this into a real gatekeeper.
Add a Filter step to block bad addresses
Insert a Filter by Zapier step directly after the verify action. A filter tells the Zap to continue only when a condition is met, so you set it to pass when the verification result is deliverable. Anything that fails the condition stops there and never reaches your CRM.
The exact wording depends on your verifier, but most return a classification field you can read inside the filter. Map your downstream actions to that field like this:
| Result | What it means | What the Zap should do |
|---|---|---|
| Deliverable | The mailbox is real and accepts mail | Continue, add the lead to your CRM |
| Risky | Catch-all, role account, or low confidence | Hold for review or tag for a double check |
| Undeliverable | The address bounces or does not exist | Stop, never add it to the list |
| Unknown | The server could not be reached in time | Retry later or send to manual review |
A simple build passes only Deliverable results straight through. A stricter build sends Risky and Unknown down a separate path, tagging them rather than discarding them, so you keep the lead without polluting your main list. Either way, the undeliverable ones are sanitized out before they can cause a bounce.
 A Filter step routes leads by their deliverability result
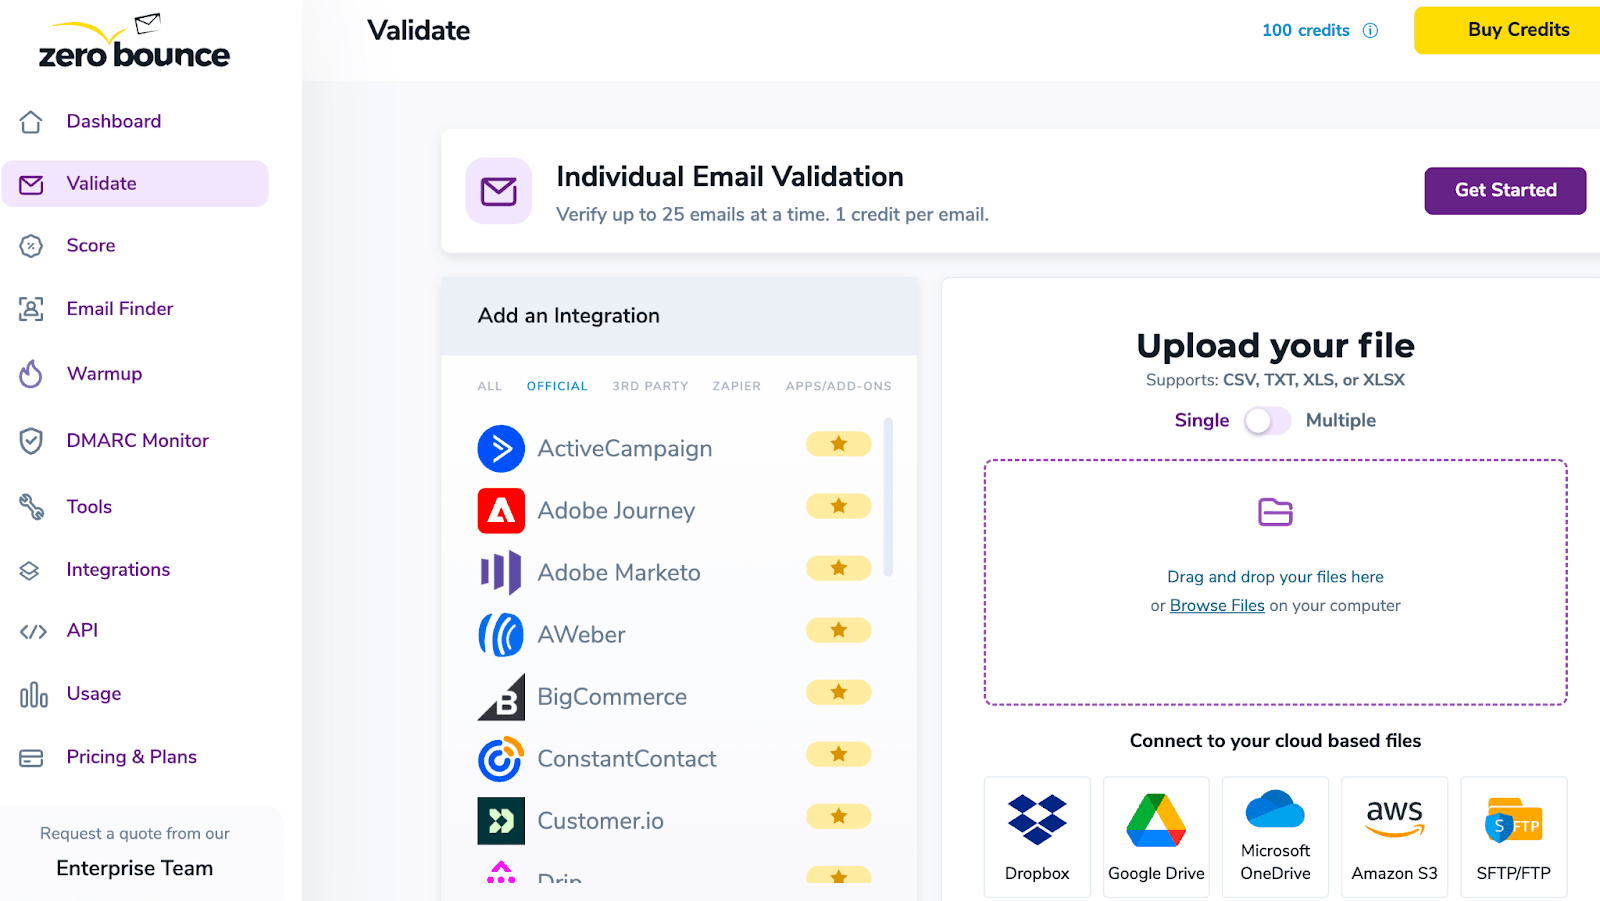
Real-time checks vs cleaning a list in bulk
The Zap above verifies one address at a time, the moment it arrives. That is the right tool for signup forms, lead magnets and checkout flows, where speed matters and volume is steady. Most verifiers also ship a separate Verify a List action for bulk jobs, which is built for the opposite situation: cleaning a list you already have, with deduplication and file import or export.
If you are scrubbing an existing database rather than catching new leads, a one-at-a-time Zap is slow and burns through tasks. A dedicated bulk email verifier handles thousands of rows in a single pass instead. It is worth understanding the trade-off between real-time and bulk verification before you commit a workflow to either approach. The same gatekeeping logic also works in other automation platforms, so if you would rather build this in Make, the building blocks map across cleanly.
Keep the Zap healthy once it is live
A verification Zap runs unattended, which makes a few habits worth building in from the start.
- Create a dedicated user in your verifier for Zapier and grant only the permissions the integration needs, instead of connecting your main login.
- Do a manual end-to-end test once the Zap is on. Submit a real lead, wait a minute or two depending on your Zapier plan, and confirm it lands where you expect.
- Watch your task usage. Every verified lead consumes a Zapier task and a verification credit, so high-volume forms can move faster than you planned.
Get those three right and the workflow looks after itself. New leads arrive, the bad ones drop out, and only addresses worth mailing reach your CRM.
Quick answers
Does Zapier verify emails in real time?
Yes. With a single-address verify action, each new lead is checked the moment the trigger fires, so you catch bad addresses before they enter your other tools rather than after a campaign bounces.
Is there a free way to verify emails through Zapier?
Several verifiers include a free tier you can connect to Zapier, often a small daily allowance of verifications. It is enough to test the workflow and handle low-volume forms before you decide on a paid plan.
What happens to invalid emails in the Zap?
They are stopped by the Filter step. Because the filter only continues on a deliverable result, undeliverable and risky addresses never reach the action that adds them to your CRM or mailing list.
Can I verify a whole existing list this way?
You can, but a one-at-a-time Zap is slow for big lists. For an existing database, use a bulk verify action or a standalone bulk verifier, and save the real-time Zap for new leads coming through your forms.
BounceCheck Team
The team behind BounceCheck - helping businesses verify emails and improve deliverability.